
Let’s start this new post entry in “professor” mode, doing a statement: “AMQP is the messaging technology chosen by the OpenStack cloud“. This link refers to Nova but is valid for any other OpenStack project. AMQP is used to facilitate the inter process communication. For example, if the Neutron DHCP agent needs to retrieve some information from the Neutron server, the RPC call rely on the AMQP service to send the request and receive the reply. But AMQP also works in a publish-subscribe pattern: a subscriber can join a topic; any new message sent to the specific AMQP topic, sent by a publisher, will be received by all subscribers. Something like a multicast message.
The default AMQP service used in OpenStack when running on Linux is RabbitMQ, a very popular message queue service available in almost all distributions.
The message queue (MQ) is used to handle the IPC between agents and servers. For example between a Neutron DHCP agent and the Neutron server, or between the Nova compute agent and the Nova server.
This description of the Neutron RPC API Layer is a good example of how it is implemented in OpenStack. However all details are hidden down into the oslo.messaging dungeons.
Using the RabbitMQ manager.
The easiest way to start debugging what is happening in your RabbitMQ service is to enable the management plugin. RabbitMQ offers a set of different plugins:
$ rabbitmq-plugins list
Listing plugins with pattern ".*" ...
 Configured: E = explicitly enabled; e = implicitly enabled
 | Status: * = running on rabbit@dev20
 |/
[  ] rabbitmq_amqp1_0                  3.8.2
[  ] rabbitmq_auth_backend_cache       3.8.2
[  ] rabbitmq_auth_backend_http        3.8.2
[  ] rabbitmq_auth_backend_ldap        3.8.2
[  ] rabbitmq_auth_backend_oauth2      3.8.2
[  ] rabbitmq_auth_mechanism_ssl       3.8.2
[  ] rabbitmq_consistent_hash_exchange 3.8.2
(there are many more...)
To enable the management plugin:
$ rabbitmq-plugins enable rabbitmq_management
Now you need the administrator user and password, that will depend on the type of installation done. For devstack installations, you need to create this user and provide the needed permissions. For example, the following commands will create a user called “guest” with password “password”. Please, do not use this in production. Or at least, once you finished, delete this user.
$ rabbitmqctl add_user guest password
$ rabbitmqctl set_user_tags guest administrator
$ rabbitmqctl clear_permissions --vhost / guest
$ rabbitmqctl set_permissions --vhost / guest ".*" ".*" ".*"
In a TripleO installation, the user and the password are located in the RabbitMQ container, located in the controllers. Inside the container, you can find the following file /etc/rabbitmq/rabbitmq.config, with the parameters “default_user” and “default_pass”:
% This file managed by Puppet
% Template Path: rabbitmq/templates/rabbitmq.config
[
  {rabbit, [
    {loopback_users, []},
    {tcp_listen_options, [
         {keepalive,     true},
         {backlog,       4096},
         {nodelay,       true},
         {linger,        {true, 0}},
         {exit_on_close, false}
    ]},
    {collect_statistics_interval, 30000},
    {tcp_listeners, [{"172.17.1.18", 5672}]},
    {cluster_partition_handling, ignore},
    {queue_master_locator, <<"min-masters">>},
    {default_user, <<"guest">>},
    {default_pass, <<"OGLkERauUOxvGVI4OjveMOESP">>}
  ]},
  {kernel, [
    {inet_dist_listen_max, 25672},
    {inet_dist_listen_min, 25672},
    {inet_dist_use_interface, {172,17,1,18}},
    {net_ticktime, 15}
  ]}
,
  {rabbitmq_management, [
    {rates_mode, none}
,    {listener, [
      {ip, "127.0.0.1"},
      {port, 15672}
    ]}
  ]}
].
% EOF
Now you are ready to browse the web interface the RabbitMQ management plugin provides. You need now to browse http://localhost:15672:
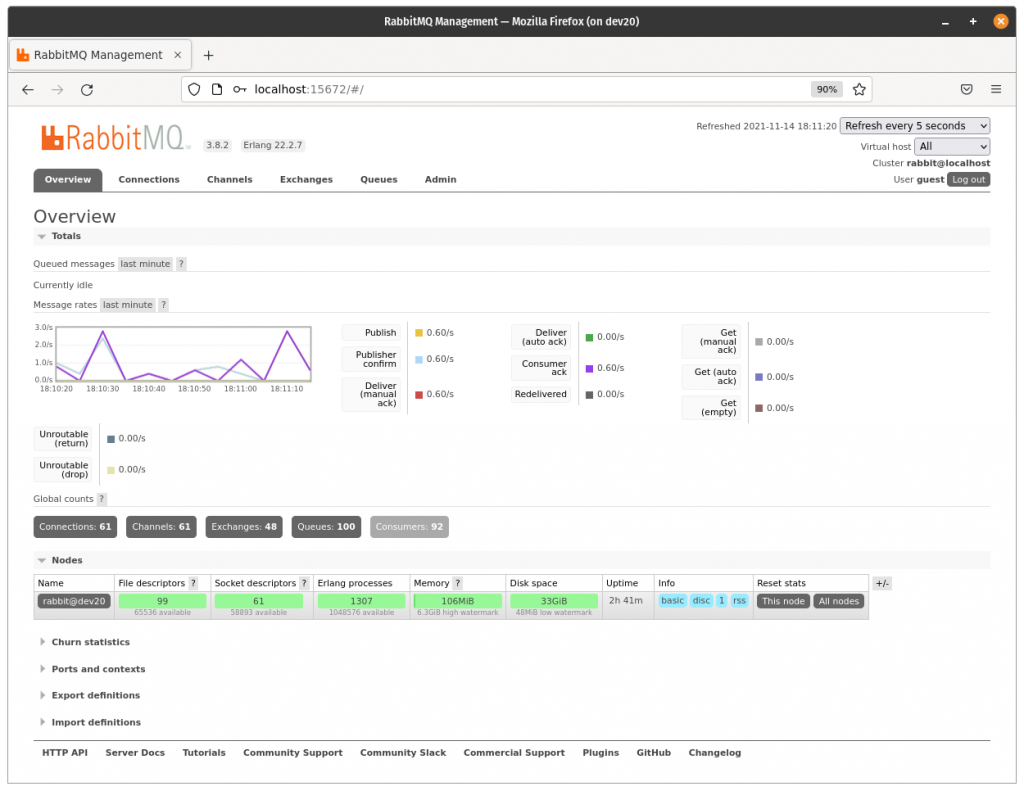
This web interface provides information about the current active connections, the channels created, the exchanges and the queues. You can also monitor the number of messages being handled by each channel or exchanges. For example, just after creating three new networks, the Neutron server publishes three new messages with the topic “network” in the MQ.
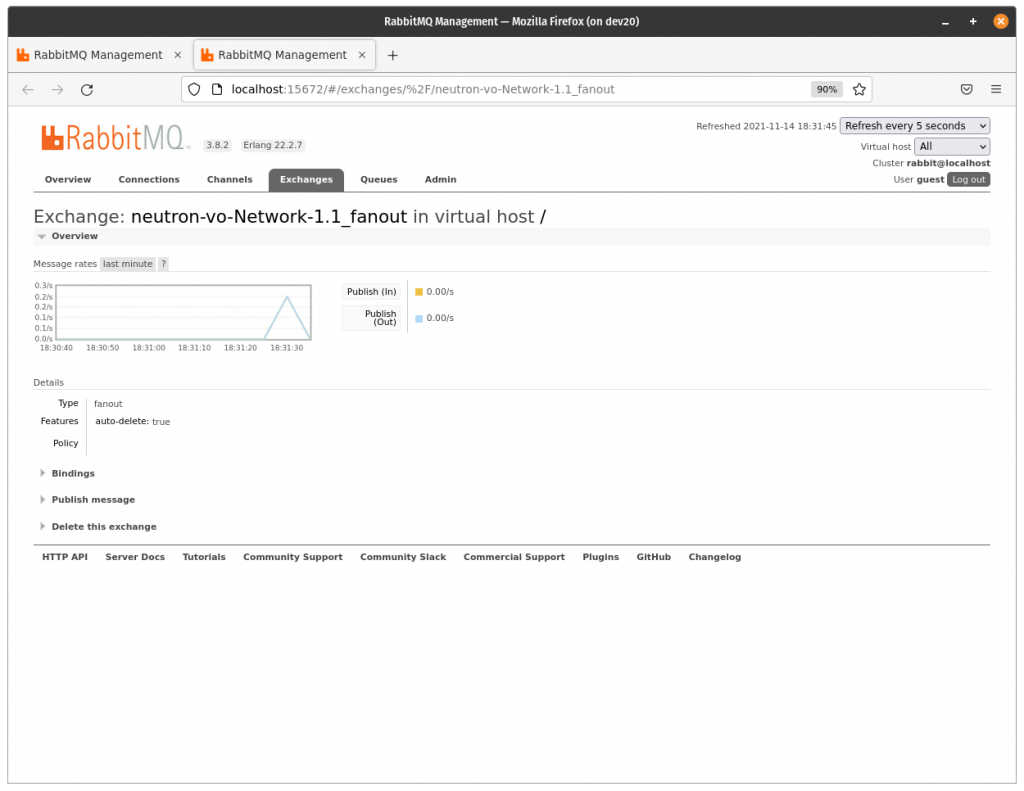
RabbitMQ uses this topic to send the messages to a specific exchange, that is responsible of routing them to the corresponding queues. Please read this fantastic blog entry by Lovisa Johansson about RabbitMQ exchanges, routing keys and bindings to learn more about it.
Cool, but I need to sniff the messages.
Usually when we have a networking problem, “tcpdump” is the first tool to be used. The goal is simple: to read what is inside each packet to try to figure what is going on. Is that possible with RabbitMQ? Yes, of course, thanks to khomenko and the script he created. The following code is just a refactor using the new API pika library provides (the original script was created 10 years ago).
# !/usr/bin/env python
import pika
import json

"""
Turn firehose on with "$ rabbitmqctl trace_on"
The USER and PASSWORD can be retrieved from "/etc/rabbitmq/rabbitmq.config"
"""

HOST = 'localhost'
USER = 'guest'
PASSWORD = 'password'


def callback(ch, method, properties, body):
    body = json.loads(body)
    print('[x] %s:%s:%s' % (method.routing_key,
                            properties.headers["node"],
                            properties.headers["routing_keys"]))
    print('    oslo.version: ', body['oslo.version'])
    print('    message: ', body['oslo.message'])
    print('')


credentials = pika.credentials.PlainCredentials(USER, PASSWORD)
conn_params = pika.ConnectionParameters(host=HOST, credentials=credentials)
connection = pika.BlockingConnection(conn_params)
channel = connection.channel()

# NOTE: the queue name "firehose" is given when enabled "trace_on".
queue_name = 'firehose'
channel.queue_declare(queue_name, exclusive=False)
channel.queue_bind(exchange='amq.rabbitmq.trace',
                   queue=queue_name,
                   routing_key="#")

print('[*] Waiting for logs. To exit press CTRL+C')

channel.basic_consume(queue_name, callback, auto_ack=True)
channel.start_consuming()
Before executing this script you need first to enable the firehose tracer. That will enable, for the administrator, the ability to see all messages exchanged per node or per vhost. Be aware that when this feature is enabled, the performance will drop.
Then you need to install “pika” library from pip. The user and the password are the same as in the previous section.
The script execution provides this information:
$ python rabbitmq_dump.py
[*] Waiting for logs. To exit press CTRL+C
[x] deliver.q-reports-plugin:rabbit@dev20:['q-reports-plugin']
    oslo.version:  2.0
    message:  {"method": "report_state", "args": {"agent_state": {"agent_state": {"binary": "neutron-metadata-agent", "host": "dev20", "topic": "N/A", "configurations": {"metadata_proxy_socket": "/opt/stack/data/neutron/metadata_proxy", "nova_metadata_host": "192.168.10.70", "nova_metadata_port": 8775, "log_agent_heartbeats": false}, "agent_type": "Metadata agent", "uuid": "223d8e2a-1a23-46a3-a308-1b28135349d9"}}, "time": "2021-11-14T19:04:40.493394"}, "version": "1.2", "_unique_id": "330e21284ba84451bf2947e3cfa2bb59", "_context_user": null, "_context_tenant": null, "_context_system_scope": null, "_context_project": null, "_context_domain": null, "_context_user_domain": null, "_context_project_domain": null, "_context_is_admin": true, "_context_read_only": false, "_context_show_deleted": false, "_context_auth_token": null, "_context_request_id": "req-ea2b2790-42a3-425f-b7e6-ddb5da0b6e00", "_context_global_request_id": null, "_context_resource_uuid": null, "_context_roles": [], "_context_user_identity": "- - - - -", "_context_is_admin_project": true, "_context_user_id": null, "_context_tenant_id": null, "_context_project_id": null, "_context_timestamp": "2021-11-12 16:39:52.588197", "_context_tenant_name": null, "_context_project_name": null, "_context_user_name": null}

[x] deliver.q-reports-plugin:rabbit@dev20:['q-reports-plugin']
    oslo.version:  2.0
    message:  {"method": "report_state", "args": {"agent_state": {"agent_state": {"binary": "neutron-dhcp-agent", "host": "dev20", "availability_zone": "nova", "topic": "dhcp_agent", "configurations": {"dhcp_driver": "neutron.agent.linux.dhcp.Dnsmasq", "dhcp_lease_duration": 86400, "log_agent_heartbeats": false, "networks": 4, "subnets": 0, "ports": 0}, "start_flag": true, "agent_type": "DHCP agent", "uuid": "db9aef6d-6302-422c-8929-c2b445fb715f"}}, "time": "2021-11-14T19:04:40.895201"}, "version": "1.2", "_msg_id": "f54cdf5eac0f43fbb92ceb683a8ae3ab", "_reply_q": "reply_53f3039ca76c4b4aac7a131ae1a240c5", "_timeout": null, "_unique_id": "133066df81f745328710b70a4ebab9c3", "_context_user": null, "_context_tenant": null, "_context_system_scope": null, "_context_project": null, "_context_domain": null, "_context_user_domain": null, "_context_project_domain": null, "_context_is_admin": true, "_context_read_only": false, "_context_show_deleted": false, "_context_auth_token": null, "_context_request_id": "req-e00a2941-edb1-4c81-af19-981c2a8fafb4", "_context_global_request_id": null, "_context_resource_uuid": null, "_context_roles": [], "_context_user_identity": "- - - - -", "_context_is_admin_project": true, "_context_user_id": null, "_context_tenant_id": null, "_context_project_id": null, "_context_timestamp": "2021-11-14 19:04:40.895147", "_context_tenant_name": null, "_context_project_name": null, "_context_user_name": null}

[x] deliver.q-plugin:rabbit@dev20:['q-plugin']
    oslo.version:  2.0
    message:  {"method": "get_active_networks_info", "args": {"host": "dev20", "enable_dhcp_filter": false}, "version": "1.1", "_msg_id": "78a7607c924640fc965d82dd9c3fa3ce", "_reply_q": "reply_53f3039ca76c4b4aac7a131ae1a240c5", "_timeout": null, "_unique_id": "805ab85321814edfb7ba60993ffc9b32", "_context_user": null, "_context_tenant": null, "_context_system_scope": null, "_context_project": null, "_context_domain": null, "_context_user_domain": null, "_context_project_domain": null, "_context_is_admin": true, "_context_read_only": false, "_context_show_deleted": false, "_context_auth_token": null, "_context_request_id": "req-eac77f64-6205-42ee-afd7-bef63fa9e3ae", "_context_global_request_id": null, "_context_resource_uuid": null, "_context_roles": [], "_context_user_identity": "- - - - -", "_context_is_admin_project": true, "_context_user_id": null, "_context_tenant_id": null, "_context_project_id": null, "_context_timestamp": "2021-11-14 19:04:40.903212", "_context_tenant_name": null, "_context_project_name": null, "_context_user_name": null}

[x] deliver.reply_53f3039ca76c4b4aac7a131ae1a240c5:rabbit@dev20:['reply_53f3039ca76c4b4aac7a131ae1a240c5']
    oslo.version:  2.0
    message:  {"result": "alive", "failure": null, "ending": true, "_msg_id": "f54cdf5eac0f43fbb92ceb683a8ae3ab", "_unique_id": "b6a2d7d64d2f4e0480cc7d3b5e4a93e4"}
You can also try the rabbitmq_tracing plugin.
I hope you find this tool useful, reducing your debugging time.